The cabinets in your kitchen and bathroom have a difficult life. Constantly being opened & closed, residing in an environment with water & moisture, and being run into by people, vacuums, pets, and any number of household items. Given this wear and tear, your cabinets are very likely to be inadvertently scratched. How do you touch-up cabinets to make those little mishaps disappear?

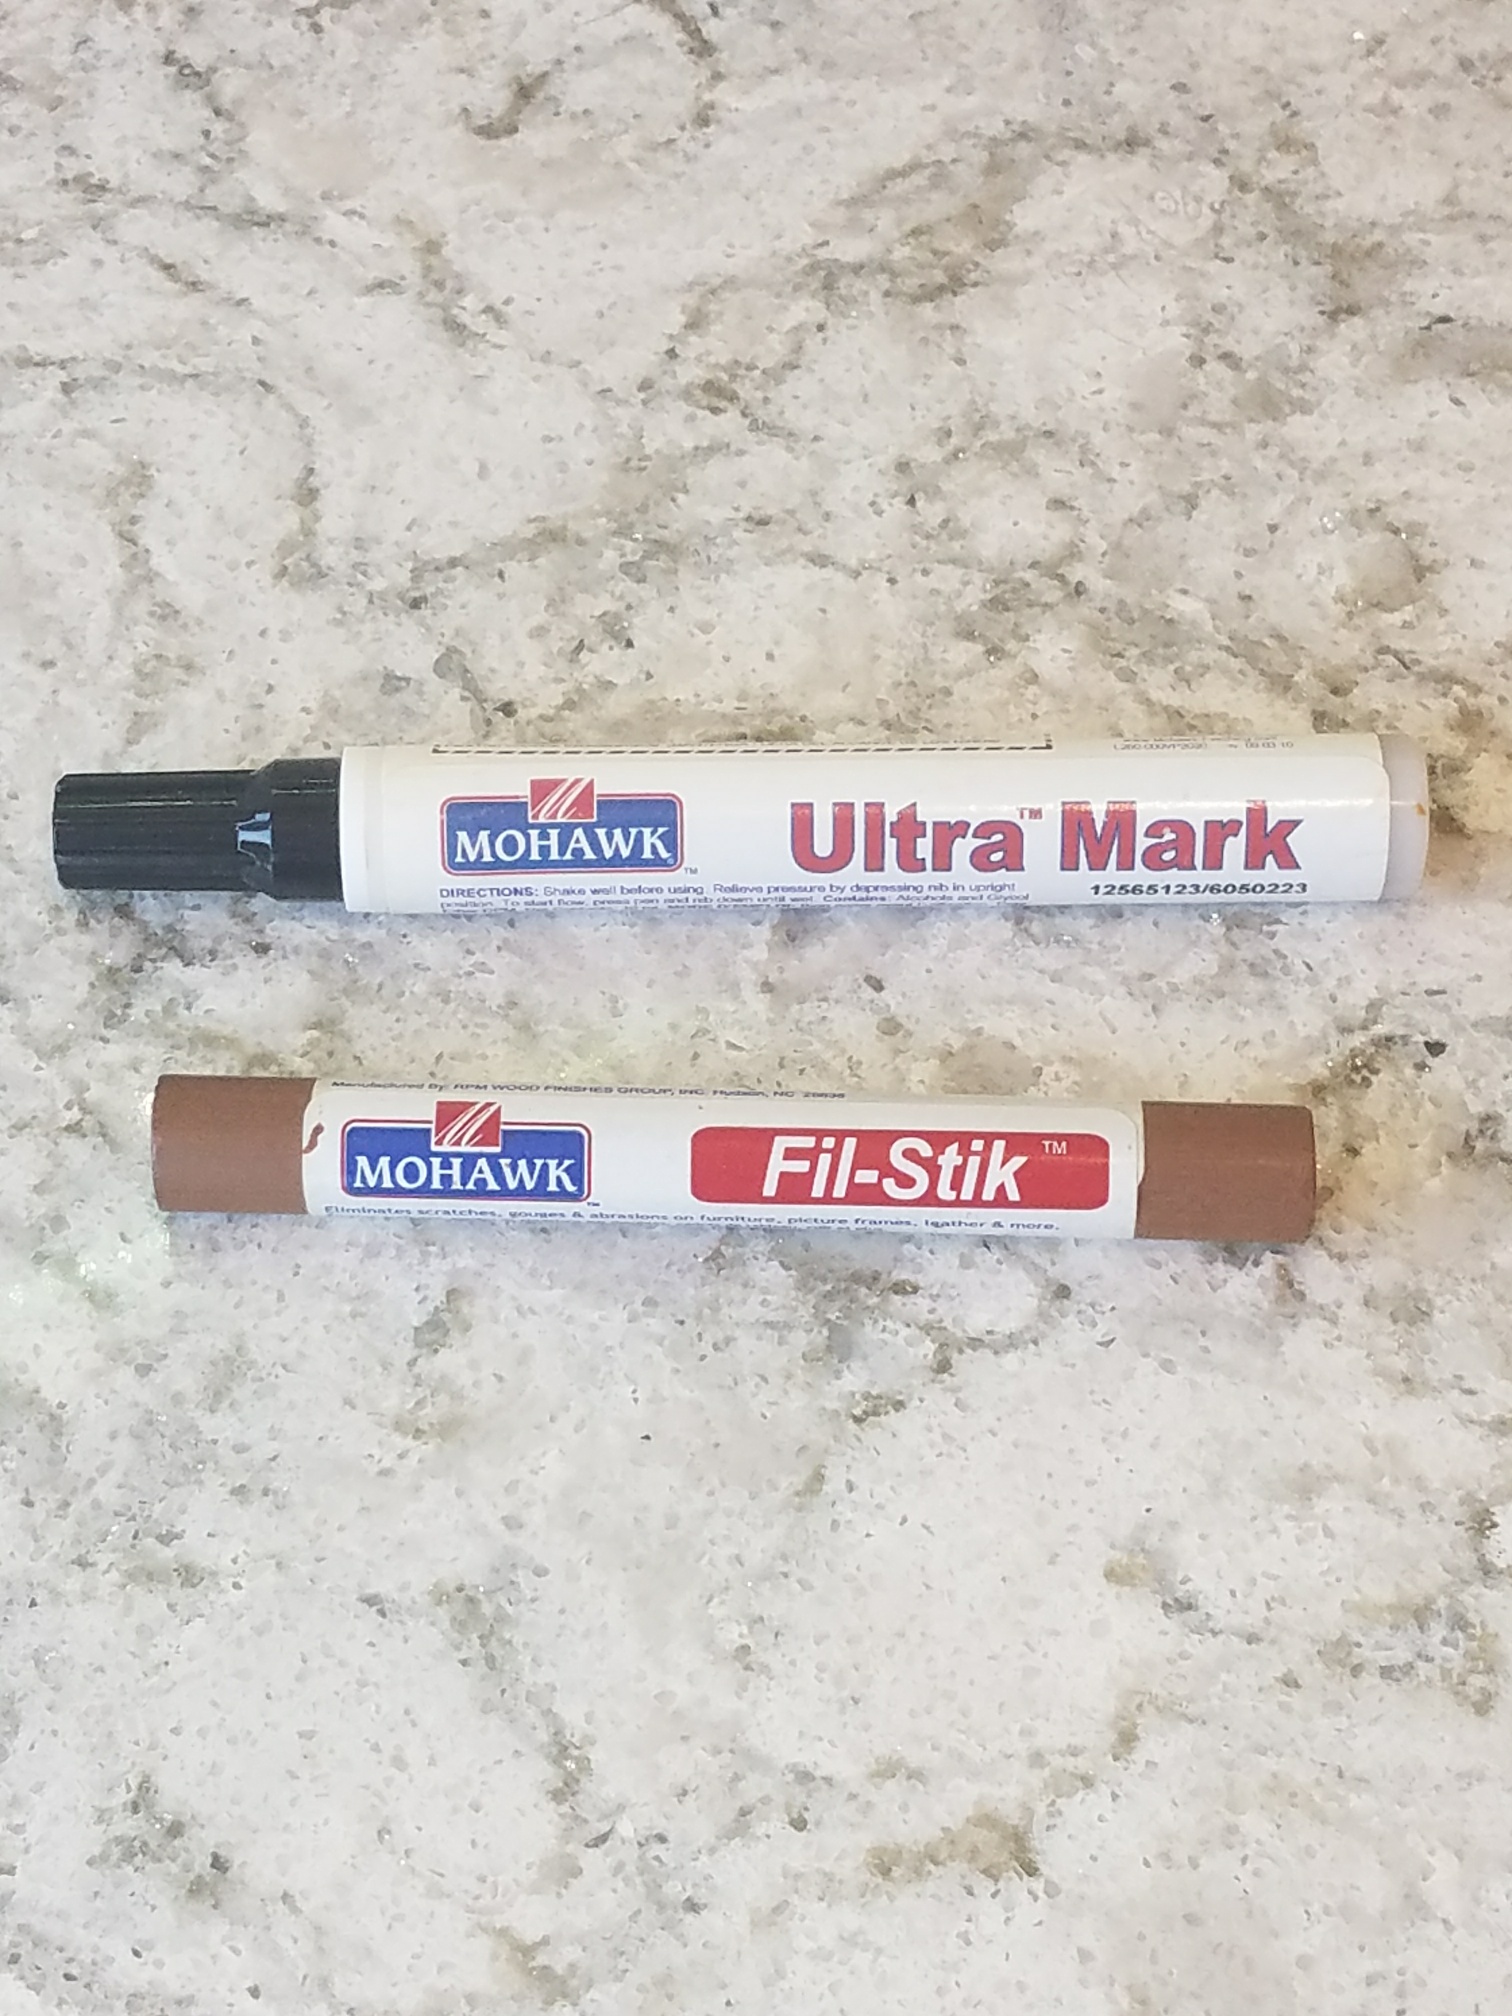
Most new cabinets come with a Touch-up Kit. These typically include a fill stick and a touch-up marker. If you do not have a kit, or it has wandered off over the years, you can purchase one from your cabinet dealer. Hardware stores also carry these touch-up markers and fill sticks, however, the color match will not be as close as the one from the cabinet manufacturer.
Fill Stick
Think of the fill stick as a big crayon. It is used to fill in bigger scratches or indentations in the cabinetry. This includes nail holes, gouges, cuts or deep scratches. Simply apply pressure to the fill stick to completely fill the scratch. There will be excess around the damaged area. Gently use an old credit card to smooth and match the surface. Finally, wipe off the area with a clean, dry, lint-free cloth.
Touch-up Marker
The touch-up marker is used on spots where the finish is damaged and raw wood is seen. This includes scratches, joints where two pieces of wood/molding meet, areas with excessive wear, or the edge of a piece of cabinetry. Before starting, most markers need to be shaken to eliminate settling of the colors. Once shaken, take and run the marker over the damaged area. It will likely take more than one coat to cover the damage. Wipe any excess off using a clean, dry, lint-free cloth. Recap the pen to prevent it from drying out.


